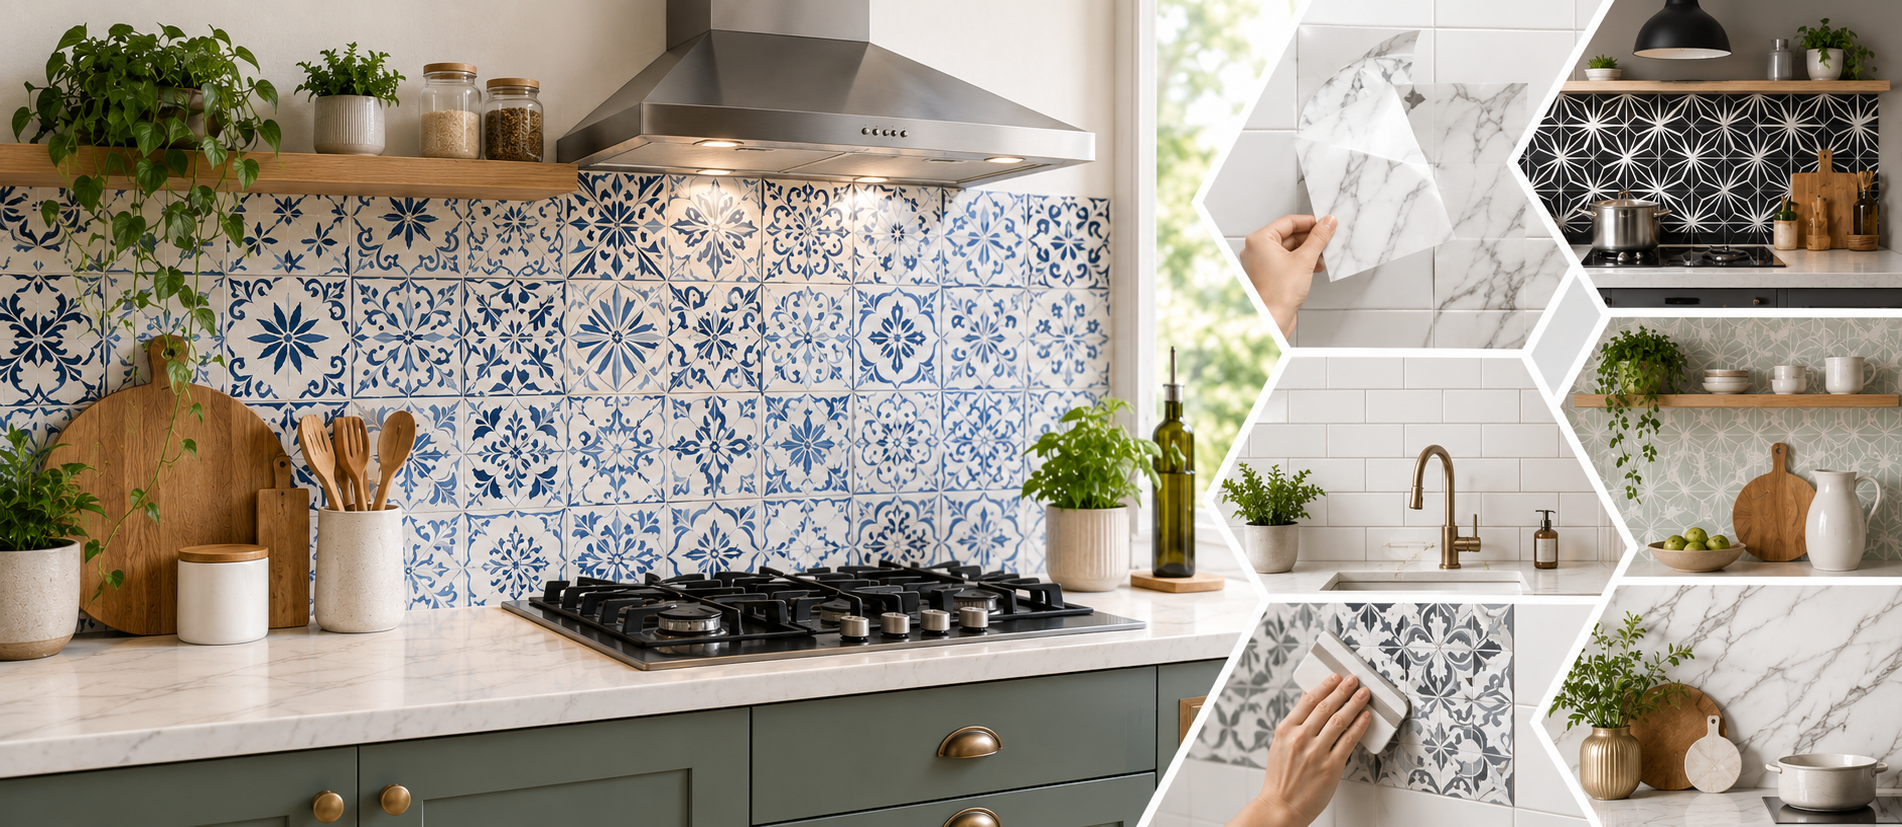

Kitchen tile stickers are self-adhesive vinyl designs that stick straight over your existing tiles or a smooth, painted wall, letting you change the look of a splashback, hob wall or backsplash in an afternoon — no tiler, no rubble and no permanent commitment. They’re waterproof, wipe-clean and, crucially for renters, they peel away cleanly when you move on.
If your kitchen tiles are dated, chipped or just not «you» anymore, ripping them out is expensive and disruptive. Stickers give you the finished look for a fraction of the cost. Below are nine ways to use them, from a five-minute hob refresh to a full backsplash transformation, plus a quick guide to surfaces, safety and application.
Why people choose stickers over retiling
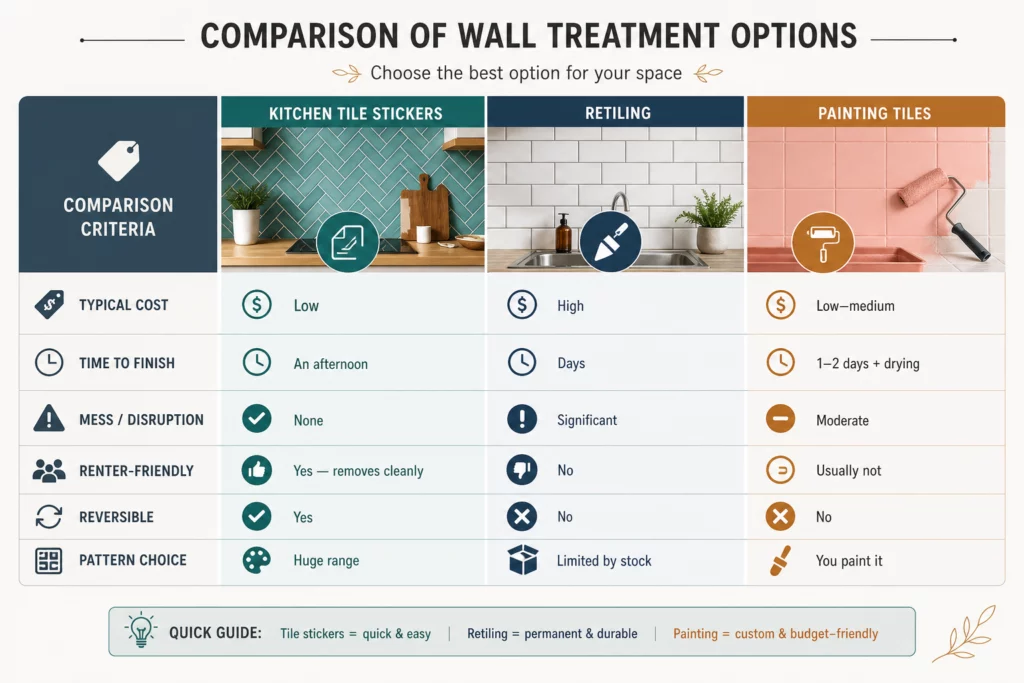
Now for the ideas.
1. Rescue a dated splashback
The fastest win in any kitchen. A tired beige or cream splashback disappears the moment you apply a fresh pattern over it. Because the stickers sit on top of your existing tiles, you keep the waterproof, wipeable surface you already have and simply upgrade the design. This is the single most popular use of kitchen tile stickers — and the easiest to reverse if you ever change your mind.
2. Frame the wall behind the hob
The area behind the hob takes the most visual attention (and the most splashes). A bold band of patterned tiles here acts as a focal point without touching the rest of the room. Keep vinyl clear of direct flames and intense heat, leave a little clearance around the burners, and you get a hard-working, easy-clean feature that looks like a designer choice.
3. Go Mediterranean with Portuguese azulejo
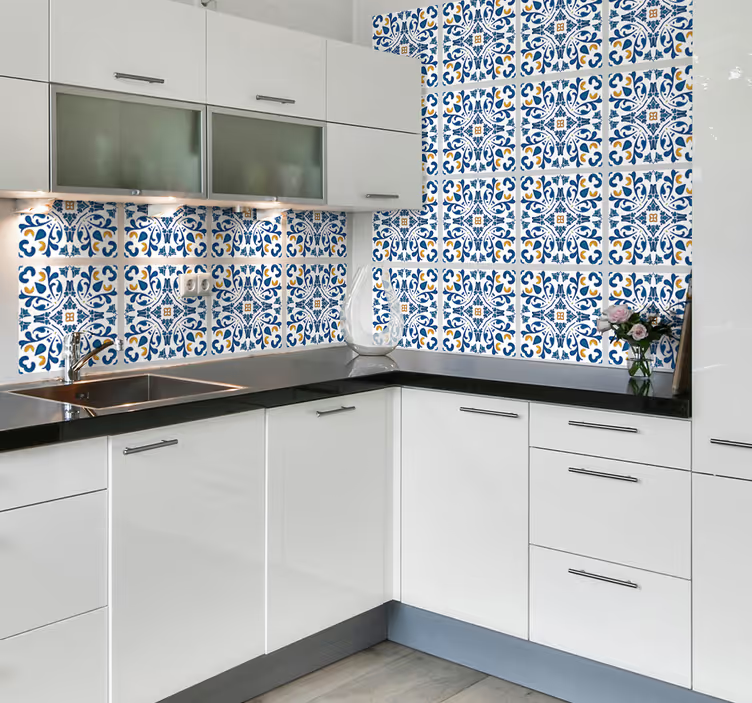
Blue-and-white azulejo and Mediterranean patterns bring warmth and character to plain modern kitchens. They suit farmhouse, coastal and eclectic styles beautifully, and because a single sticker pack covers a defined area, you can create a rich, hand-painted look that would cost a fortune in real ceramic.
4. Keep it sharp with monochrome geometric
For contemporary and minimalist kitchens, black-and-white geometric designs — hexagons, chevrons, encaustic-style repeats — add structure without colour clutter. They pair especially well with grey, sage or navy units and matte-black taps.
5. Fake a fortune with marble-effect
Marble-effect tile stickers deliver that high-end, veined-stone finish for a tiny slice of the price of the real thing. Used across a splashback or run behind open shelving, they read as luxe even in a small or budget kitchen.
6. Do a full renter-friendly backsplash
Renting? This is decorating on your terms. Cover the whole backsplash to completely change the room’s mood, then peel it all away — cleanly, with no marks or residue — when it’s time to hand the keys back. It’s one of the few ways to make a real visual change to a rental kitchen that your landlord won’t mind.
7. Add accents to open shelving and alcoves
You don’t have to tile a whole wall. A single row of patterned stickers along the back of open shelving, inside a niche, or as a border adds a considered, styled detail — the kind of finishing touch that makes a kitchen feel designed rather than assembled.
8. Brighten a small or dark kitchen
In compact kitchens, light, reflective and small-scale patterns help the space feel bigger and airier. Pale marble, soft geometrics and light florals bounce light around and stop a small galley kitchen from feeling boxed in.
9. Mix and match for a bespoke look
Because designs come in coordinated ranges, you can combine a bold pattern behind the hob with a calmer one across the rest of the splashback, or alternate two tiles for a custom checkerboard. It’s the closest thing to a made-to-measure kitchen without the made-to-measure invoice.
Which surfaces can you apply them to?
Kitchen tile stickers are made for smooth, clean, non-porous surfaces: existing ceramic tiles, glass, and satin or gloss-painted walls. They are not suited to rough, textured, chalky or matte surfaces, because the adhesive needs a smooth face to grip. Give the area a proper clean and let it dry fully before you start — grease is the number-one reason a sticker lifts.
How hard are they to apply?
Not hard at all — no DIY experience needed. In short: clean the surface, peel the backing, position from the top and smooth downwards with a cloth or squeegee to push out air bubbles. That’s it.
A quick word on the kitchen environment
Kitchens throw steam, splashes and heat at your walls, so two sensible habits keep stickers looking their best: wipe them with a soft, damp cloth rather than harsh abrasives, and keep any vinyl away from open flames and the hottest zones around the hob. Treated kindly, they cope easily with the everyday humidity of a busy kitchen.
Frequently asked questions
Do kitchen tile stickers look cheap up close? No — modern printed vinyl reproduces pattern, colour and even subtle texture convincingly, and once applied flat over existing tiles the grout lines and finish read as genuine. Marble and azulejo designs in particular are hard to distinguish from the real thing at normal viewing distance.
Can I put kitchen tile stickers over textured or embossed tiles? It’s best avoided. The adhesive is designed for smooth, non-porous surfaces, so heavily textured, embossed or matte tiles won’t give a reliable, long-lasting bond. Flat ceramic tiles, glass and gloss-painted walls are ideal.
Will they come off cleanly when I move out? Yes. That’s the point for renters — they remove without leaving marks, damage or residue on the wall or tile beneath, so there’s nothing to explain at check-out.
How many stickers do I need for my splashback? Measure the height and width of the area you want to cover, then check the coverage listed on each design. It’s always worth ordering a little extra to allow for trimming around sockets, edges and the hob.
Ready to refresh your kitchen?
You don’t need a renovation budget or a free weekend of chaos to fall back in love with your kitchen. Pick a pattern, clean your surface, and transform your splashback before dinner.